I Mustache You A Question

18 Feb

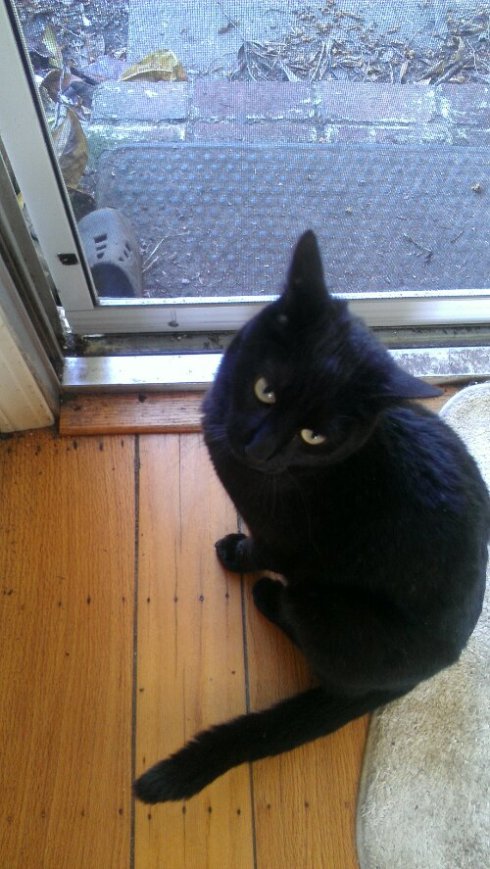
I don’t know if you’re aware, but there is a mustache craze going on right now. Between products like these and the popularity of Movember, I think the mustache trend is here to stay. Personally, I became obsessed with mustaches because of this little lady:

image

One glance and I was hooked. And incidentally today is Sally and my one-year anniversary! Yes, I am celebrating my anniversary with my kitty-kat. I used to think these “kinds” of people were, ahem, a little weird, but I can proudly say I am now one of them. Before I get to the recipe {there is one, promise} let me tell you a story of a kitty that needed a home and a girl that needed a kitty…

When I moved to Boston, I really wanted a cat. Desperately. I grew up with cats all my life–when I moved to the East Coast, I left these babies at home:

image

My fluffy cat, Kalypso

My dad's cat {and replacement for his children, ahem} Mr. Cat

My dad’s cat {and replacement for his children, ahem} Mr. Cat

I knew getting a cat in Boston was not the smartest idea, since I had no idea if I would be staying in Boston after I graduated. So I waited. And waited. And then grad school was over! And the bf and I decided hey, let’s stay in Boston! So off to the shelter I went.

The first round of shelter-visiting was not good. We went to a Petco adoption day, which apparently only existed on the Internet. Sigh. We visited another in-store adoption, but alas, no matches. Double sigh. The next weekend, we decided to go to the Boston MSPCA. I picked a cat online via Petfinder that I liked {he had six toes! I mean, come on!} but he was sick and not ready for adoption. As I walked into the cat room/area, I thought that this was the end, I would never find a kitty to love.

But then, at the end of the room, in a cage all to herself, was my Sally. Back then, she was called Callie {for calico}. And Foliage. She has two names because she was–and still is–bad-ass. I opened the door to pet her and BAM. Instant connection. You can ask Elise about it, she saw. Sally immediately nuzzled up to my hand and started purring. I grabbed her info sheet off the door and ran to the front desk and said “THIS IS MY CAT”. Luckily, Sally was already spayed and microchipped, so I got to take her home that day! It was fate.

Sally's first photo

Sally’s first photo

Sally gave birth to four little babies when in foster care {I threw away the picture of her and the babies when I moved, why?} and when they were brought to the shelter, the babies got snatched up, but no one wanted the mama. That’s ok, because I did! We did the paperwork, payment, checked with the landlord and roommates to make sure they would even let me have a cat, and then we ventured home. I take pride in the fact that my Sally turned my non-cat loving friends into {conditional} cat lovers.

Oh, and that whole part about getting a cat in Boston because I would stay in Boston? Yea that didn’t last. In April, I decided to move back to California. And so started the trans-America move with cat in-tow. Hence the leash video and pictures like these:

Torture

Torture

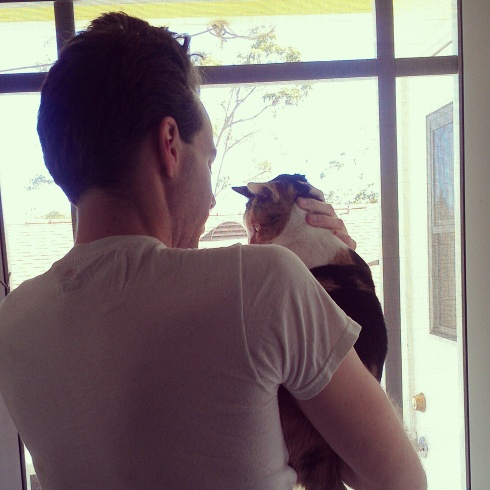
If you follow me on Instagram you know that I am obsessed with Sally. Like,crazy-stalker obsessed. Luckily, when John and Sally met, it was love at first sight. He is also obsessed, as seen here:

Sally and John

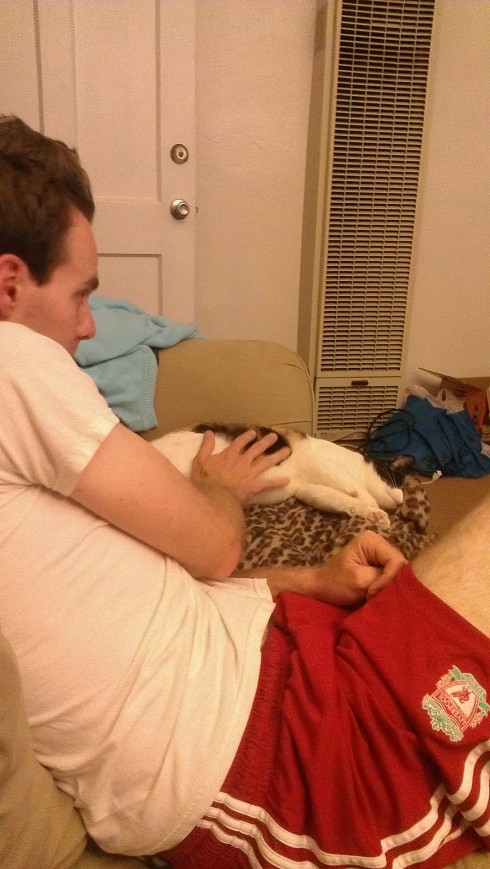
And here:

John petting Sally

The moral of this story is: I love my kitty, my boyfriend loves my our kitty, adopt kitties from the shelter because they are the best! Use Petfinder.com to find pets in local shelters! {not a sponsored post, btw}

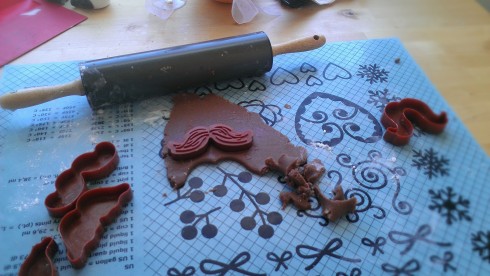
And with that, I give you these awesome mustache sugar cookies! These cookie cutters were a gift from said boyfriend. He found them at Target!

Sally’s Mustache Sugar Cookies

Ingredients:

Sugar cookie dough {either from scratch or from a pre-made mix}

2 tbsp cocoa powder

Directions:

Pre-heat oven to 350

Prepare dough per directions

Add two tbsp cocoa powder

Mix well

Roll out dough on a lightly floured surface, about 1/4 inch thick

Rollin' the dough

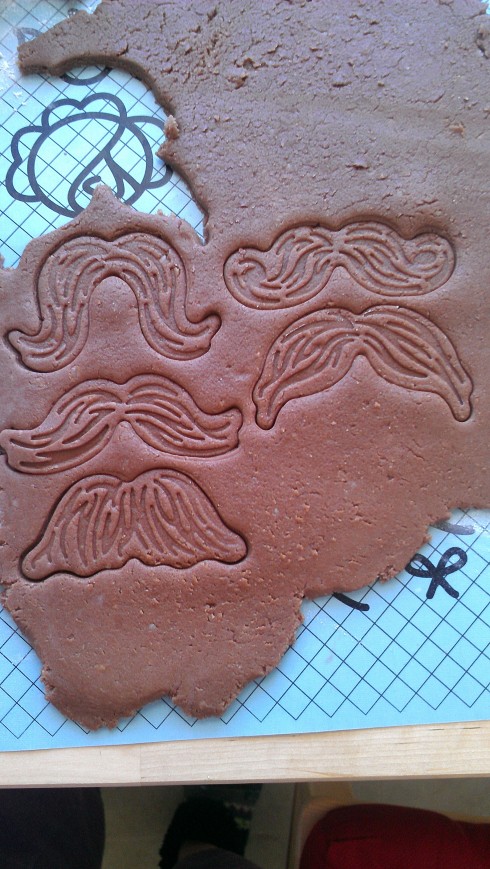
Cut out dough with cookie cutters {they are cutters on one side, and a stamp on the other!}

Mustache cookie dough

Place cookies on an ungreased baking sheet {I put mine on parchment paper, worked great!}

Bake for 5-7 minutes and let cool

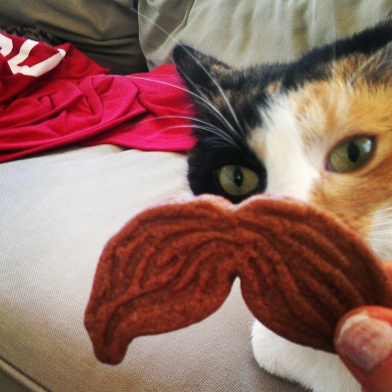
Take funny pictures

Mustache Sally

Mustache Sally

Happy anniversary my Sally cat! You are the weirdest, funniest, sweetest kitty ever and we are lucky that you are ours :) It’s true when they ask…do you rescue pets, or do they rescue you? xoxo

Weirdo

Weirdo

Valentine’s Day Pecan Pie

12 Feb

Happy Valentine’s Day friends! I think the blog universe is playing a little trick on me for taking such a looooong time off from updating and posting on my blog. The last two recipes I attempted to make came out, ahem, less than perfect. To be fair, both desserts still taste good {I think} but the presentation has been sub-par, in my opinion. Ah well. It’s how it tastes that really matters, right? …Right?

Anyway…John had been nagging me to make him a pecan pie since, oh, his birthday. I didn’t make one for his birthday. I didn’t make one for Thanksgiving either. To be fair, though, he had some pecan pie at Christmas when we went back east to visit his mom. John then declared that pecan pie is his all-time favorite. So, I decided that I shall bake him a pie as an early Valentine’s Day present, since he loves it oh so much.

I should preface this by saying that I overcooked the crust {oops} because I fail at reading directions. Sometimes I just like to skip steps, I guess. Minus the well-done crust, the pie is actually pretty good. Hopefully when you guys make this, you follow all  the directions!

{no link, this recipe was taken from the back of the Karo syrup bottle}

Ingredients

1 cup corn syrup {there is light and dark syrup. Light has a light color/flavor, and a more vanilla-y taste. Dark corn syrup has molasses in it and has a stronger taste. You can use whichever you want, it doesn’t matter}

3 eggs

1 cup sugar

2 tbsp melted butter

1 tsp vanilla extract

1 1/2 cups (6-ounces) pecans

Directions

Preheat oven to 350

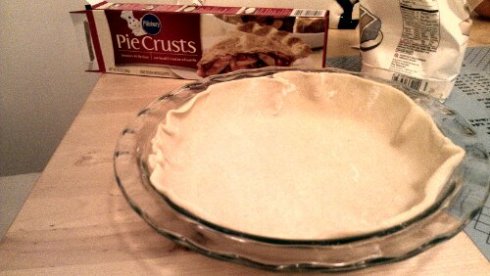
Prepare pie crust according to directions {aka make sure your pie crust is thawed if you are using pre-made and do not bake before!}

image

{I went pre-made. I admit I’m not a fan of making my own crusts}

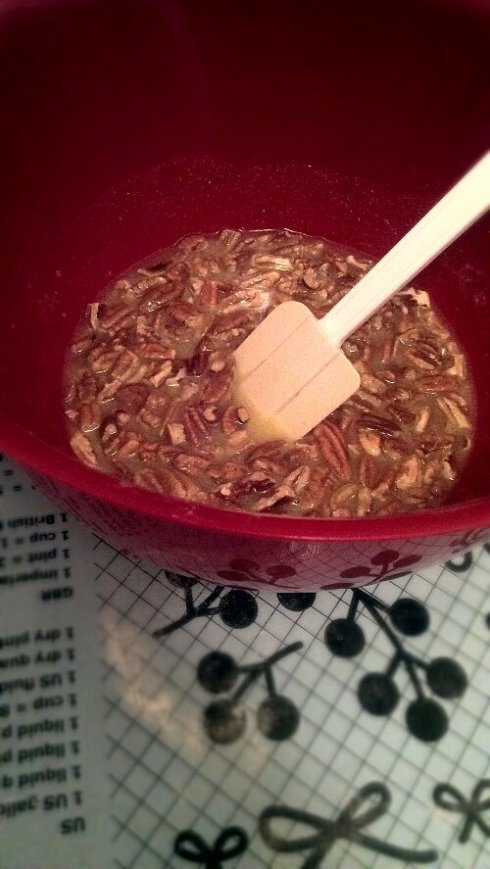
In a large bowl, combine the first 5 ingredients. Mix well.

Add pecans and stir together

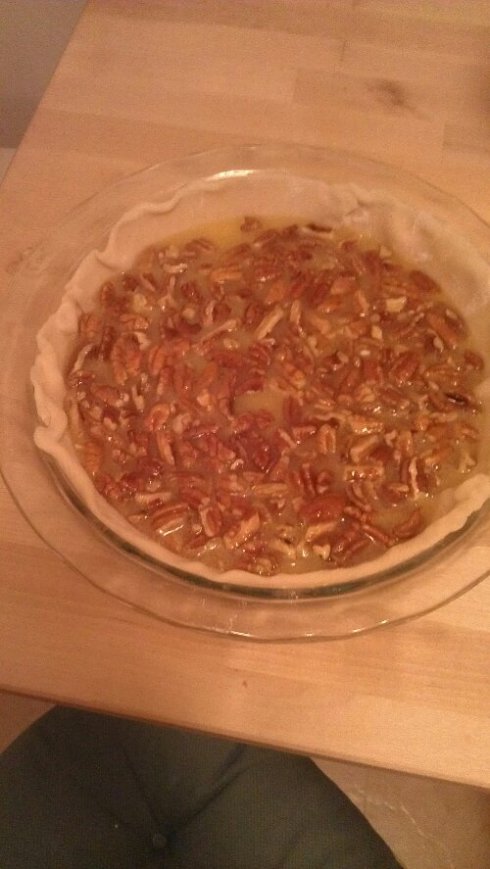
Pour filling into pie crust.

image

image

Reduce oven to 325 degrees! {This is where I messed up, oops}

Bake for 60-70 minutes.

If you find that even when you reduce the heat of the oven, the crust is still over-cooking, cover the edges of the crust with foil. Pie is done when the middle springs back when you tap the side of the pan.

Let pie cool for at least two hours. Store covered in the fridge.

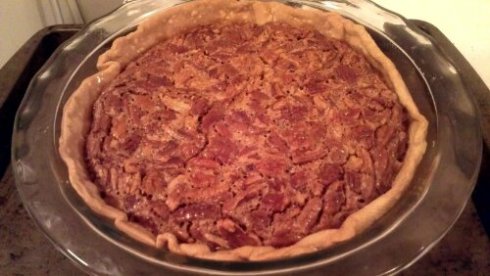
image

Tada!

Even though I over did the crust, the pie was boyfriend approved. This is a pretty sweet pie {in taste, and in awesomeness}. If you’re not into lots of sugar, you could probably reduce the 1 cup of sugar to 3/4, or even less, if you’d like.

Happy Valentine’s Day, folks! Hope you get to spend some sweet time with your sweets! {as in people. And chocolates}

Um….

7 Feb

So I accidentally published a post that wasn’t supposed to go out until NEXT WEEK! Ahhh. It’s been deleted, but if you subscribe and saw it, delete! Turn away! DON’T READ IT! Please. I promise it will be better when it’s posted for real, when there are pictures and such :)

The Return

5 Feb

Oh hey there. Apparently I like to take four-month long hiatusi hiatuses from this here blog. I don’t really know why…I love this blog! I love sharing all the yummy things I make with you guys. I guess I was feeling a bit uninspired lately. My prime baking surges used to be during stressful school times, such as midterms, finals, and oh you know, just general school time. Seeing as I am not in school these days, I guess my level of stress has diminished, for the most part. Good for my blood pressure, bad for my baking.

I anticipated sharing this yummy recipe with you folks today that I found via Pinterest:


But it just DID NOT happen. I don’t know why. I could not get these cute little footballs to look like cute little footballs. Ah well. I made some pretty awesome oatmeal cookies instead {from a recipe found on the back of the Ralph’s oatmeal container…} I do have a pretty bangin’ post planned for later this week, so stay tuned {if y’all are still out there. Are you?} I’ve also ventured into the land of–gasp–Cooking! Like, with ingredients that aren’t just sugar and flour. So hopefully I will share some of those noms with you as well.

Stay tuned! As always..it’s a cake walk!

It’s Fall! …Kind Of

28 Oct

Happy last week of October, everyone! That means it’s officially fall, right? Halloween is coming, Thanksgiving is just around the corner, and before you know it, Black Friday will be here and twinkle lights will be popping up on every house. This week means pumpkin-flavored everything is in full force {Currently in my pantry, I have pumpkin coffee, a can of pumpkin for baking, pumpkin pancake mix, and pumpkin butter}, the boots come out of storage, and all your fall clothes make an appearance. Unless you live in San Diego, where it’s been 80+ degrees all week! Now don’t get me wrong, I LOVE San Diego and I am ecstatic to be back {I am not envious of the hurricane on the East Coast right now, and the snow storms in winter} but I really, really miss fall. Where the leaves change, the air is crisp, and you can smell when people are starting to use their fireplaces. I miss wearing matching flannel shirts with friends, gray fall skies, and going to the pumpkin patch to eat donuts and drink apple cider.

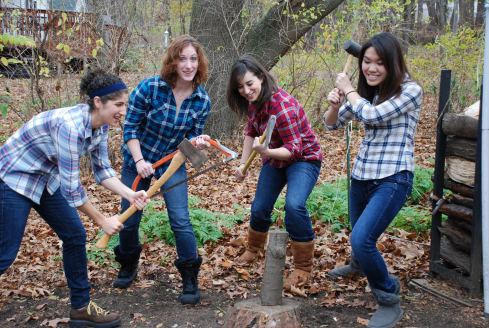
Thanksgiving 2011 with the Nicholsons. In matching flannel, of course.

Today, in an attempt to get some fall into our lives, John and I ventured up to Julian with some friends. The goal was to get inspired to bake some yummy fall recipes {even though it was 80 degrees outside and I couldn’t wear my cute fall outfit I had planned}. Regardless of the heat, we had a great time. We ate, we drank, we picked pumpkins. Success! Speaking of baking, here are some of the fall recipes I’ve been pinning lately.

Pumpkin Rolls

Source: the-girl-who-ate-everything.com via Abra on Pinterest

Candy Corn Sugar Cookies

Source: kathiecooks.blogspot.com via Abra on Pinterest

Homemade Nutella

{that last one isn’t fall related, but homemade Nutella? What?!}

Any thoughts or suggestions on fall must-bakes this season? Happy Fall!

A Special Birthday Post

2 Oct

Today is a special someone’s birthday…

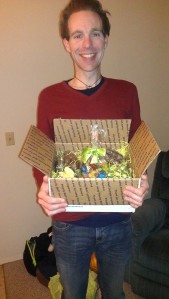
Super excited about his Easter basket {from April 2012


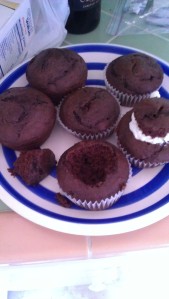
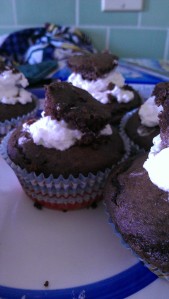
and after almost 3 years together, John and I are finally  able to spend his birthday together. John had a list of requested for birthday treats, but he finally narrowed it down to two: cinnamon rolls for breakfast, and bottle cap cupcakes to take to work and share with his friends {not even kidding}. I had no idea what these were, but apparently John’s mom made them for him as a kid, so of course I had to oblige. The recipe is quite easy, but very tasty {no link, his mamma e-mailed it to me}

Bottle Cap Cupcakes

Ingredients

  • Chocolate cake mix {and whatever ingredients your cake mix calls for, usually water, oil and egg}
  • Carton of heavy whipping cream
  • ~2 tablespoons of sugar

Directions

  • Prepare cake mix per instructions on the package
  • Line a cupcake pan with cupcake liners
  • Bake your cupcakes according to instructions. Cupcakes are done when you can insert and remove a knife cleanly in the center of the cake.
  • While cupcakes cool, pour the carton of heavy whipping cream into a large bowl. Mix on high speed with an electric mixer. As you mix, add sugar to taste.
  • Mix until stiff peaks form.
  • When cupcakes are completely cool, cut a deep hole in the middle {I put my cupcakes in the fridge to speed up the cooling}. If your cupcakes are still warm, the whipped cream will melt.

Ready for whipped cream


  • Fill the opening with whipped cream, as much or as little as you want. Place the cut-out on top of the filling
  • Take to work/school and share with your friends! {or hoard for yourself, no judgement}


Happy birthday to you, my love and my best friend.


California Girl {Again}

20 Sep

You may have noticed a lack in updates {…yet again}. But I promise it was for a good reason! I packed up my Boston life into three BIG boxes, two suitcases, grabbed Sally the cat and moved us across the country back to sunny California. After a stressful few weeks {Sally was living with her kitty cousins, but they did NOT like her. There were many peeing incidents to mark territory, a broken-legged puppy, and a stay in the pet hotel. Not to mention the guilt of this fur mama leaving her Sally cat all alone} the boyfriend and I FINALLY found a place to call home. We’re still unpacking, but Sandra Lee is proudly displayed in the new kitchen, and when I get some baking ingredients and mixing bowls, the blog will be goin’ again. Boyfriend’s birthday is next month and he’s already requested a cake. And homemade muffins on a weekly basis {we’ll see about that one…}

Meanwhile, I leave you with this video of Sally’s first encounter with her leash and harness {it was a plane necessity–SO glad I bought it!} I apologize in advance for my ridiculous laughing.


P.S. Boston friends–I miss you. Send me Dunkin’ Donuts, PLEASE :) {Or just deliver yourselves to my doorstep. That would be even better}

White-Chocolate Raspberry Birthday

6 Aug

When I started this post, it was my roommate’s birthday… in JUNE! Since then, I’ve just been  unfortunately busy with work, planning on moving {T-8 days, ah!} and casually watching obsessing over the Olympics. Is anyone else as sad as me that Michael Phelps is done with swimming, forever!? As a former competitive swimmer myself {not Olympic caliber…} I have truly enjoyed watching him swim over the last 12 years, and I shed a tear after his last race on Saturday. Thank you Michael, for being an inspiration for swimmers and non-swimmers alike–you really are the greatest Olympian of all time.

But enough of that….

As I said, almost two months ago was my awesome roommate’s birthday! {I won’t spill the deets on how old she is, but let’s just say… she’s getting up there, ha} To commemorate her ascent out of her early/mid 20’s, I decided to try a new cheesecake recipe.  Cheesecakes are great cakes to make for people that a) generally don’t like cake b)like a lighter flavor, since you can add a lot of yummy summer and refreshing fruit flavors {raspberries, strawberries, orange, lemons, etc} and c)really like cream cheese.

Happy birthday Ginny!

Recipe from Allrecipes.com (crust adapted from Paula Deen’s Pumpkin Cheesecake recipe)

White Chocolate Raspberry Cheesecake

Ingredients

Crust:

  • 1 3/4 cups graham cracker crumbs
  • 3 tablespoons brown sugar (light or dark is fine)
  • 1/2 teaspoon ground cinnamon
  • 1 stick melted butter

Cake:

  • 1 (approx 10 ounces) package of frozen raspberries
  • 2 tablespoons sugar
  • 2 teaspoons cornstarch
  • 1/2 cup water
  • 1/2 cup half-and-half cream
  • 3 (8 ounce) packages of cream cheese–24 ounces total
  • 1/2 cup sugar
  • 3 eggs
  • 1 teaspoon vanilla extract

Directions

  • In a medium bowl, combine graham cracker crumb {if you’re like me and don’t have a food processor, a blender on the “ice crush” setting works great to make crumbs!} with brown sugar, cinnamon and melted butter. Mix well and press into 9″ springform pan. Set aside
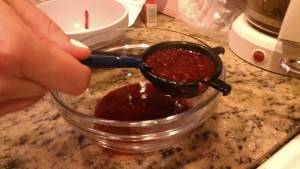
  • In a pot/saucepan, mix raspberries, water, cornstarch, and 2 cups sugar over medium-high heat. Stir to combine. Bring to a boil and let boil until thick, about 5 minutes {feel free to add more water/cornstarch to create desired consistency. Cornstarch will make syrup thicker, water will make it thinner, more like a juice than a syrup}.
  • Strain sauce through a mesh strainer to get rid of the seeds {I wasn’t sure about this step at first, but trust me, you wanna get those seeds out}

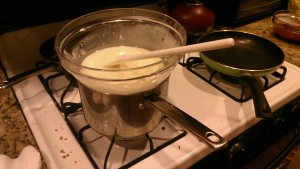
  • Preheat oven to 325 degrees. In a glass bowl {All recipes says metal, but I like glass better..} over a pot of simmering water, melt white chocolate chips in half-and-half. Stir occasionally until smooth. Set aside.

  • In a large bowl, mix cream cheese and 1/2 cup sugar with electric mixer until smooth. Beat in eggs one at a time. Add in vanilla and white chocolate sauce and mix until combined.
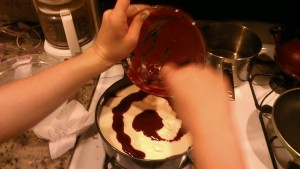
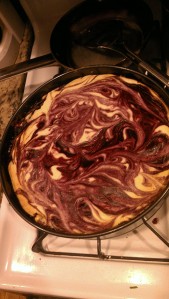
  • Pour half of the batter over the crust, then 3 tablespoons of raspberry sauce {really, you can add as little or as much as you want}. Pour remaining batter, and another 3 tablespoons of sauce on top. Use a knife to swirl the raspberry sauce with the batter to make a pretty marble effect!

  • Bake for 55-60 minutes {tip–When your cheesecake is done baking, it should be slightly jiggley in middle. As the cheesecake cools, the middle will set}. After cheesecake is done, cover in plastic-wrap and let cool overnight.

Ta-Da!

I think this is my new favorite cheesecake {I feel like I say this about everything I bake}. Ginny and I devoured it in less than a week {it’s a little shameful that I can admit that}. I’m sorry for the long break between posts and I will try to do my best to blog on a regular basis. Next time, I will be writing to you from sunny CALIFORNIA! Big things are in store :)

As always, remember, it’s a cake walk! Have fun with the last few weeks of summer baking! xoxo

Cinnamon Roll Brunch

30 May

Hope you guys had a fabulous Memorial Day weekend! Over here in Boston, the weather was A-M-A-Z-I-N-G! The sun was shinning, the sky was clear–the perfect combination for swim-suits in the park and long summer runs {and by long I mean 2-miles, unless you are the fabulous Elise and are kickin’ butt in your half marathon!!!}

What was left of our brunch feast

These rolls are definitely my new breakfast go-to food, so friends, if/when you invite me over to brunch, except these to make an appearance. But seriously. Try them and you will see what I’m talking about.

Any long weekend calls for a brunch with friends to celebrate the fact that you’re not at work on Monday morning. After doing a little blog reading, I discovered a new site with incredible recipes, including this super easy, super yummy cinnamon roll recipe! I have been wanting to make these for forever and never found one I liked/was willing to try. But these…these give Pillsbury a serious run for their money. The Baker Chick is my new kitchen role-model! Recipe was found here on her blog. And huge bonus, these legitimately take all freaking day 90 minutes, including prep-time, waiting for the dough to rise, and bake time. Oh, and browned butter is my new favorite smell. Trust me.

90 minute cinnamon rolls

Ingredients

For the dough:

  • 3/4 cup milk
  • 1/4 cup butter
  • 3 1/4 cups all purpose flour
  • 1 (.25) package instant yeast
  • 1/4 cup sugar {regular white, granulated sugar}
  • 1/2 teaspoon salt
  • 1/4 cup water
  • 1 egg

For the filling:

  • 1 cup brown sugar {pack it in tight!}
  • 1 tablespoon ground cinnamon
  • 1/2 cup butter

For the frosting:

  • 2 tablespoons softened {not melted} butter
  • 4 oz cream cheese
  • 1 tsp vanilla extract
  • 2 cups powdered sugar {you can use more or less depending on taste, I used less}

Directions

  • Heat milk in a saucepan until it bubbles–remove from heat. Add butter and stir until melted. Set aside and let cool.
  • In a large mixing bowl, combine 2 1/4 cups flour, yeast, salt and sugar–whisk together. Add water, egg and milk mixture, and beat with an electric mixer.
  • Add the remaining flour slowly a mix well with a wooden spoon because dough will be too sticky for the beaters {you probably could use the dough hook on your KitchenAid, but I have yet to use mine, so I just did it manually. Plus you don’t have to mix for that long so it wasn’t too bad}. When dough has just pulled together {all the ingredients are just combined} knead on a lightly floured surface until smooth, about 5 minutes. You’ll know the dough is ready because it will spring back when you press it.
  • Cover the dough with a damp cloth and let rest for 10 minutes. Meanwhile, brown your butter! {the Baker Chick does it in the microwave, but I did it stove top which isn’t too hard. I found instructions from Simply Recipes}
  • To brown your butter, heat skillet over medium-high heat. Cut butter into slices and place in pan, stirring/whisking frequently {you need to keep the butter moving so it doesn’t burn}. Your butter will bubble and foam, and then brown specks will start to form. Once you see the brown color, remove skillet from heat, but keep stirring. The butter will still cook but will not burn. {Seriously, stick your nose in the pan and smell–it’s the best smell EVER!}
  • While the butter cools slightly, mix brown sugar and cinnamon together in a small bowl.
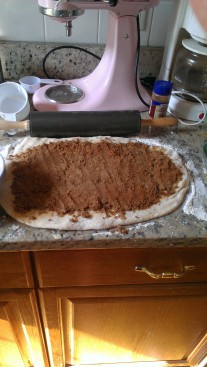
  • On a lightly floured surface, roll out your dough in approximately a 12×9 in rectangle {use your 9×13 baking dish as a guide}. Using a pastry brush–or a spoon–spread 90% of the brown butter over the dough. Sprinkle dough with cinnamon-sugar mixture, and press into the butter so everything stays put when you roll it all up.


My roll looks a little sad, but believe me, it still tasted delicious!

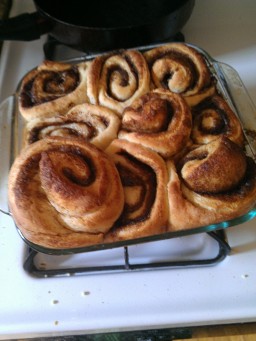
  • Roll up your dough and pinch the seam to seal. Cut into 12 {more or less if you can is fine} even pieces and place in a 9×13 baking dish {I used a smaller one, trust me, use the larger one!}. Drizzle the remaining brown butter over the rolls, and cover with a damp cloth and let rise somewhere warm until doubled, about30 minutes. I like to let mine rise in a sunny spot. Meanwhile, preheat your oven to 375 degrees
  • Bake rolls for 20 minutes, or until golden-brown. Let cool for about 10 minutes and serve warm, with cream cheese frosting {recipe below}

See what I mean about using a bigger pan? They were pretty squished in there

Home-made cream cheese frosting

{I have another cream cheese frosting recipe on the blog from last year’s Valentine’s Day. Both are similar, but Paula Deen’s recipe has a lot more sugar, cream cheese and butter….while neither are great for you, this one seems like it will clog your arteries a little less!}

  • Whip together the softened butter and cream cheese with an electric mixer until smooth and creamy
  • Add the vanilla and powdered sugar, 1/2 cup at a time, to taste. Beat until creamy and spreadable

If you have any of these rolls leftover from brunch {unlikely, but possible}, you can store them in a tupperware container in the fridge. Just zap them in the microwave and they’ll still have that just-out-of-the-oven taste. Mmmmm. Also, the frosting can be put in the freezer and saved for a rainy day. I hope you guys like this recipe because I am seriously obsessed. The feedback from my friends for this baking adventure was these were definitely in the top 5 things I’ve ever made. YAY.

Have a happy, happy week! And have fun baking, as always remember, it’s a cake walk!

Marvelous Lemon Meringue Pie

29 May

My dad was in town last week for graduation {YAY BU COM!} and he brought a ton of lemons for me from his backyard in California. Why, you ask? Just because So I could make him lemon meringue pie. My dad actually taught me how to make this delicious dessert years ago, but since then, the student has surpassed the master, aka I make a bangin’ pie and my dad’s attempts have been…well, not impressive, to say the least (Sorry Dad!). This is probably one of the harder recipes that I have made, since it requires a lot of attention, many steps and everything has to be just right in order for the entire pie to work. But the result is scrumptious. I love this pie–it’s the perfect summer recipe because of it’s light, fresh flavor, but I make this pie year-round as well {my family often has this in addition to or instead of pumpkin pie on Thanksgiving}. Lemon meringue rivals the other, absolutely favorite dessert, blackberry pie–always homemade in the summer from my dad’s backyard blackberry patch.

The happy graduate


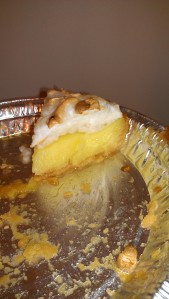
I apologize for the lack of pictures in this post…this pie went quickly, but I managed to get a picture of the last piece {desserts tend to last longer when I’m home alone and the only one eating them. M&Ms, on the other hand, are a different story}.

the last piece…

Don’t be discouraged if this doesn’t turn out exactly perfect, it takes time and practice!

Lemon Meringue Pie

Ingredients

  • Zest of 1 lemon
  • 1/2 cup fresh-squeezed lemon juice
  • 4 eggs, separated {one bowl for eggs yolks, one bowl for egg whites}
  • 1 cup sugar
  • 1/3 cup cornstarch
  • 1/8 teaspoon salt (just a pinch!)
  •  1 1/2 warm water
  • 1 tablespoon butter
  • 9-inch pie crust

For Meringue

  • 1/4 teaspoon salt
  • 1/2 cup sugar

Directions

Pie Filling

  • If you are using a pre-made pie crust, prepare according to package directions (each one is slightly different). If you are making from scratch, follow from recipe book. I’m lazy and never make my own pie crust–the store bought ones taste just as good to me!
  • Pre-heat oven to (number) degrees
  • In a small saucepan, combine sugar, cornstarch and salt. Stir in lemon zest, lemon juice and water. Cook over medium-high heat, stirring continuously {no lumps!} until sauce thickens and boils. This should take about 20-25 minutes. The sauce usually starts to boil along the edge of the pot–I like to be able to see a couple bubbles before I’m satisfied.
  • Remove pot from heat.
  • Pour a spoonful of the warm sauce into the egg yolks, beating quickly to avoid lumps {this process is called tempering–if you poured all the egg yolks into the warm sauce, the yolks would cook. This way, both the eggs and sauce become roughly the same temperature)
  • Pour the remaining egg mixture into the sauce. Return to low heat.
  • Stir egg mixture until thicken, but do not boil {one or two bubbles is ok, but once you see a boil starting, turn the heat off!}
  • Mix in butter. When butter is combined, pour filling into pie crust

Meringue

  • Pour egg whites into a large bowl, or bowl of your stand mixer
  • Add salt
  • Beat until soft peaks form {when you take the beaters out, the egg whites should stand up but then bend over immediately, you don’t want them standing straight up yet–those are stiff peaks}
  • Slowly add it sugar, beat until sugar is dissolved and stiff peaks form.

Assemble

  • Spread meringue over the pie filling. Using a spatula, distribute evenly and create decorative peaks.
  • Bake for 10 minutes, until meringue is golden.
  • Let cool overnight {if you can!} Otherwise you can cool the pie in the fridge for several hours. Refrigerate leftovers

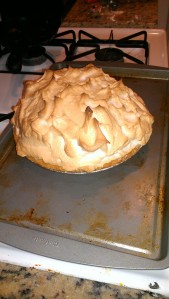
the finished pie

For whatever reason, this pie was h.e.a.v.y on the meringue. I think maybe it was from using the KitchenAid and its super powerful mixing powers. Either way, my dad ate a piece every day he was here, and isn’t that the validation us bakers constantly strive for?

Happy happy Memorial Day Weekend! Remember–it’s a cake walk!